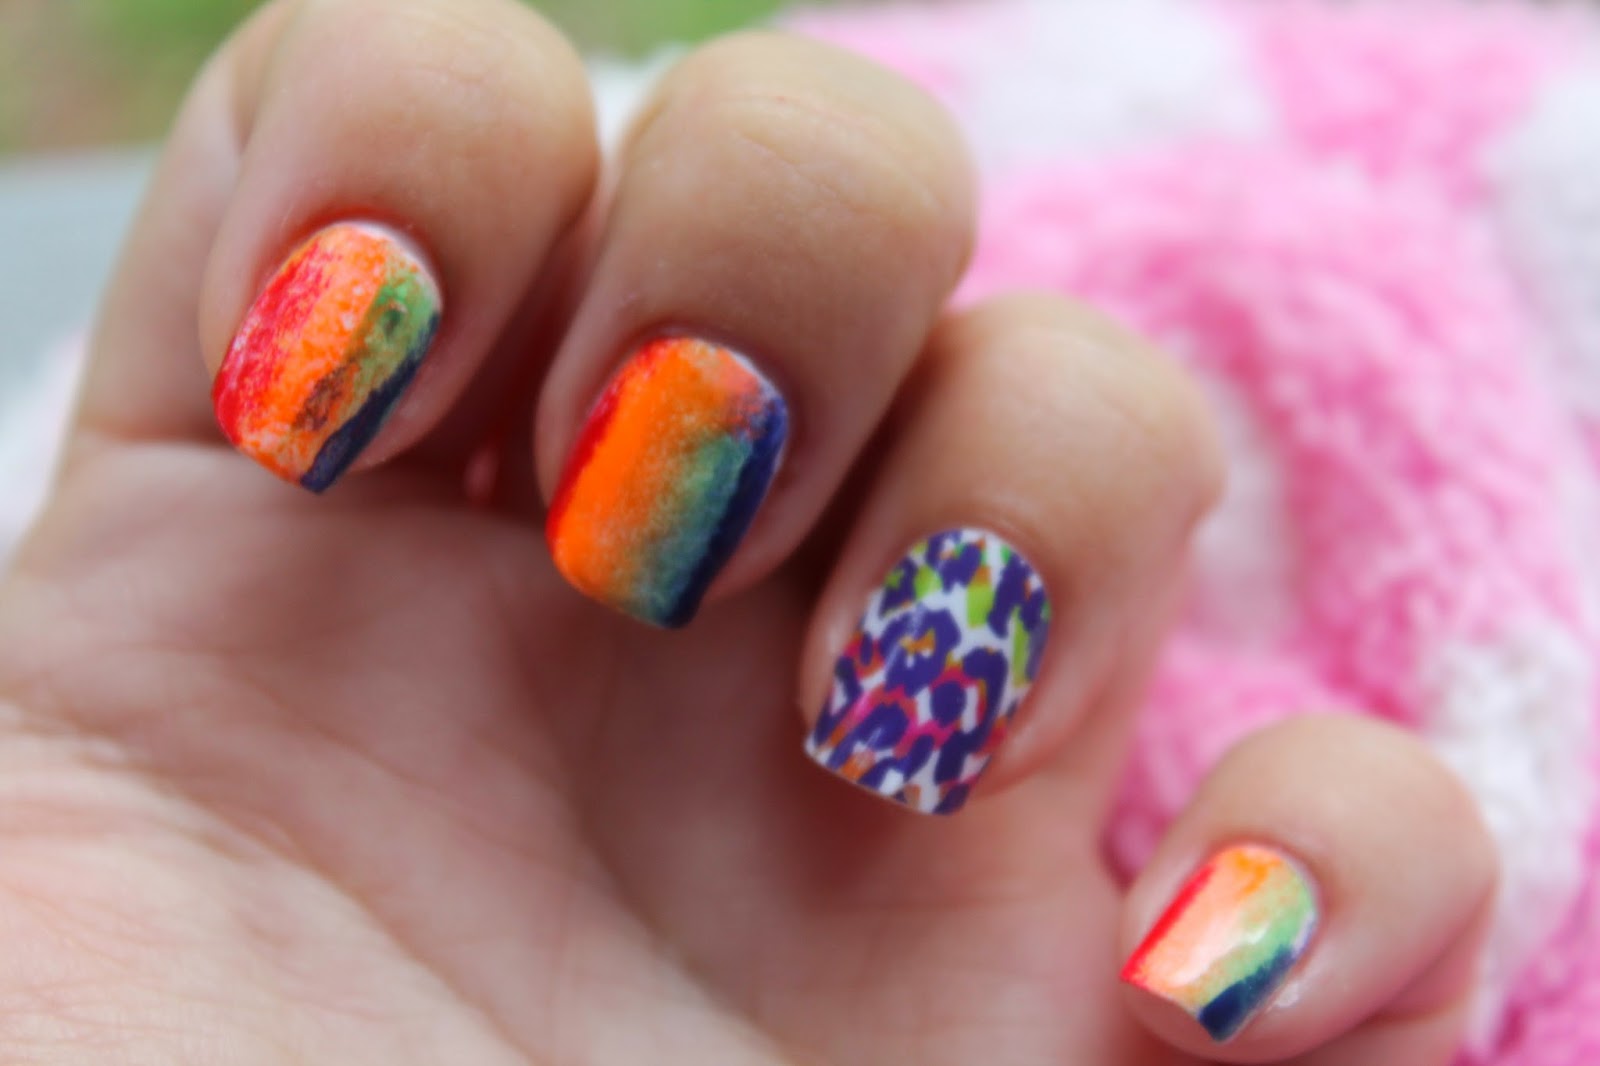
Hey gals! I wanted to do something colorful and a little messy. I'd say I succeeded! I started off with base coat and then two coats of My Fair Lily from Aurora Lacquers. Its a pale pink/ white polish.
Once that was fully dried I went over the skin around my nails with Vapid Lacquers Cuticle balm. If you are working with sponges/ stamping/ water-marbling I highly recommend using some type of barrier. Tape, cuticle balm. lotion, Elmer's glue, whatever. It makes clean up so much easier and isn't as harsh on your skin.
Next pick your colors and line 'em up! I used Juleps and a sally hansen. I Cant believe I don't have any Julep reds! I need to fix that!
Uncap everything so that you can work quickly. Excuse my messy table :p This is the "art table" it is well loved and the one table that is allowed to be messy. Its covered in polish, acrylics, crayon, paint, you name it!
Paint your sponge! In the future I will cut my sponge in half. This was way too huge. Part of the magic of using the sponge is the colors will mingle a bit. So do not expect perfect lines. We're going for artsy and fun here!
Stamp, cleanup and slap a top coat on! I used a Funky Cheetah Jamberry from my buddy :D
Have you tried nail art with a makeup sponge? I'd love to see it!
Hey Gals! I've been meaning to post about Jamberrys for awhile now, but recently Shea, a consultant, sent me some wraps to review so now I have a reason to get it done! You can find her site here Okay so Whats a Jamberry? Its a printed piece of high gloss Vinyl with an adhesive backing. How long do they last? This depends on so many things! How well you apply them, how rough you are on your hands and nails, and so on. The website lists up to two weeks. I get about 5-7 days for my nails. My toes two weeks ( it could go longer but the gap from growth bothers me ! ) I do want to note that Jamberry has changed to a thinner longer lasting Vinyl this past year. So if you tried them before you might want to give another go. Ive tried both versions and the newer ones do curve and last better/ longer and stronger over all. How much do they cost? Jams are $15 per sheet plus shipping. That gets you 2-3 manis and a pedi per sheet. I did make a video but it kept going in and out of focus. I also realized that it might be better for you to see other methods before trying on your own. Okay lets begin! You will need:
Jamberry Wraps
Buffer
Orangestick or tweezers
Nail scissors
nail file
Rubber tipped cuticle pusher
Alcohol wipe or cotton ball with alcohol
Source of heat. Either a heater/ hairdryer/ rice bag
These wraps are typically worn on a natural nail but i have worn them on polish and gel and acrylic with no issues.
These are not just stickers you can slap on and go. So when you are ready to apply expect 10-15 min to do a good job. If this is your first rodeo expect to take 20 minutes. I highly recommend for your first "jam" session you do one nail as an accent and paint the rest. This is known as the Jamberry challenge!
After you have everything together:
Wash your hands well with a non moisturizing soap like dawn.
Dry well
push back cuticles. A cuticle remover is a great idea!
rub dry clean nail with alcohol.
some recommend a light spritz of hair spray.
allow to dry a few seconds.
The clear plastic backing helps you to pick what size is best for you. Its better to be too small than to big. You don't want any of it to touch your skin or cuticles or it will come off ( like when applying gel polish)
I like to cut them in half and pick them up with the orange stick. You can use tweezers or your finger. You want to avoid touching anything that you want to stick to your nail.
Now look at the tops of your nails. If they have a strong C curve like this then I recommend the apply cold/ rice-bag method.
If they have a less prominent curve like this I recommend the heat before applying method.
(Special thanks to Lisa, Julie, Randi, and Raleigh for posing :D)
Cold apply:
Hot apply:
Hot apply:
Cold apply:
This is a half sheet of Jams and this is how much I had left after one application.
The scraps are great for french tips :
Here's my wraps from day 1-5. In all honesty I could have reheated them and resealed them but I change my nails so frequently!
Hey Gals! Today I have 3 pieces from the "Family Don't End With Blood" collection, that comes straight out of the Supernatural TV Universe! This polish was sent to me in exchange for an honest review. This collection will be launching in her Etsy store on May 20th alongside the last episode of season 9. Holy cow 9 seasons? I watched a few episodes of season 1, maybe I need to see them all :D Onto the pretties!
Left-Hunter's Helper is a light nude scattered holo and is whiskey scented. Right- Fight the Fairies is an opalescent glitter topper and is cream scented. (Because fairies love cream )
Shown here is two coats Hunter's Helper (no top coat) . I used April Showers by Flower for the deep blue as a base under One coat of Fight the Fairies (ring finger)
So pretty! I also wanted to point out if you are allergic or do not like scents then you can get unscented polish.
The whiskey scent was my favorite out of the three. You can get any polish with any scent you like!
Next is Cherry pie!
Cherry Pie is a sheer red leaning pink scattered holo and its smells like.... You guessed it! Cherry pie!
Shown below is two coats of Cherry pie over one coat of white polish. Because I am a nerd I drew some cherries with a stem that makes the pi symbol :p Get it?! Cherry Pi?!
The glitter on the cherries is Fight the Fairies.
I had to know if the scent lasted with a topcoat. I found the scent lasted even after top coat but only for about a day and a half. Without topcoat, it was still smellin' good four days later. You can find FLL on Facebook and Etsy.
Overall I liked this indie brand. Drying time was good, formula was thicker as most indies are. The polish leveled well. I plan on picking up a few of her shades in the near future. You can too with 10% off! Just use code SEASONTEN. Be sure you spend at least $10 to make the code active.
Hey Gals! This months square hue takes us on a trip to Tokyo! This is my second box from them and I certainly was not disappointed!! I had to jump on some nail art right away! Now I know these pics are casting some huge shadows. I thought Id try something different called shooting in sunbeams. Its where you wait until the early evening and only photo on the beams of sun that come in through the blinds. I think it looks cool, kind of artsy. I know it may not appeal to everyones eye so try not to say anything if you can be sweet :D Since tomorrows nail art challenge is Polka dots I thought I would swatch and dot!
Hahaha do you see the baby hand photobombing me here:
I can't get over how amazing these colors look together!! Do you Square Hue? Can't wait to see what everyone else thinks about this month!!!
I know I am!! Brittany ( the maker of BBP) got into polish making because she was tired of commercial brands chipping and wearing on her nails. She sent me two bottles to wear, review and share with you lovely ladies! My polishes came in a brown box with packing peanuts. They were tucked away safe in their own classy vessel sealed with a BBP seal <3
How swoon worthy is this packaging?! And don't worry the ribbon slide off the bottom so you can open your polish without damaging the wax seal! Im a weirdo and definitely will be storing mine in the package next to my rack :D
The labels are clear, and the polish is 3 free, vegan, cruelty free and pet safe!
On the left is Cupids arrow and it is a creamy almost neon pink! To the right is Puppy Love. It is a reddish pink jelly with white hex glitter and tiny circle pink glitter. The tiny pink glitters do make a slight texture. I love texture polish but if your not a fan, one thin top coat makes it all smooth. I have to say I am VERY impressed with wear time! I wore puppy love for 6 days and there was no wear! Ive worn Cupids arrow for 3 days and also no chips! Here is Cupids Arrow outdoors:
and indoors:
This is a comparison of Puppy love and cupids arrow on the same nail. The top one is with a glossy topcoat and the bottom finger shows them with matte :
Here is Puppy Love:
Heres a video I made that shows some tips on how to apply glitter polish : (warning there is an intro clip with the word bitch for my at work/ mommy readers)
Brittany has been so kind as to offer 10% discount code off her store with the code: NAILOFATALE
Its only good through March 2nd! Have you tried BBP? If not you need to!




.JPG)


